Showing posts with label recipes. Show all posts

Thursday, July 17, 2014

Queso Fresco: How to Make It

"The poets have been mysteriously silent on the subject of cheese."
-G.K. Chesterton


Cheese-making belongs to that class of mysterious household arts from which many shrink alongside homemade croissants, folding fitted sheets, and whether balsamic ought to be stored in the fridge or pantry. How does one make cheese? is the question many seem to hold at arm's length as if proper admittance of such a question might mark one as an eccentric. Surely it can't be terribly difficult if Bedouin trampers can make it in their wine-skins while trotting about camel-back … and yet there was that one article discussing the vehement battle fought to secure the name of a certain type of cheese as belonging only to cheeses made in a certain set of caves somewhere in France. So maybe it is difficult?
I have tried my hand at making goat's cheese before to small failure. It wasn't that the cheese didn't work so much as the fact that it didn't taste like the cheese I had eaten elsewhere. It didn't taste like chevre. Huge surprise, considering I didn't buy chevre culture (or any culture at all). It turns out that the cheese one can make without cultures and rennet is loosely called “queso fresco” which sounds like Spenglish for “fresh cheese” which is the essential character of the thing. We have begun a goat share program which has helped with cutting down on the gallons of excess milk that seem to collect around the house, but there was still plenty of extra and Mama requested that I preserve our lives by making cheese in the few days I am home between iGovern camps.
She had purchased cheese cultures and rennet last year but it seems that you are supposed to store those accoutrements in the refrigerator, not a kitchen drawer. Ehehehe. Then it was queso fresco again for me. I rolled up my mental sleeves, Mama laid out the cheese-making things, and there I was. The secret about queso fresco is best said in the words of the blogger at Serious Eats: “It's almost as easy as making a pot of tea. Except you need cheesecloth.”

In faith, she's right. All you need to make goat cheese is unpasteurized (or very lightly pasteurized) milk, a large pot, some vinegar or lemon juice, and some cheesecloth. Heat one gallon of milk, stirring occasionally, till wisps of steam come off the surface, or to 180 degrees Fahrenheit. Remove from the heat, stir in 1/2 cup of the vinegar or lemon juice and let it sit for a while till curdles form. Strain the curdles into a cheese-cloth-lined colander, then tie the corners of your cloth into a bag and "hang" your cheese by sliding a wooden spoon through the knots and dangling it to drip by weight so it isn't a soggy mess. Then you take it down, mush a lot of fabulous flavors into it, and voila: you've made queso fresco.


I have made five batches in the fifteen hours, resulting in some pretty darn fabulous combinations. First three batches were:
Mediterranean Herb
(cheese salt, fresh basil, oregano, and thyme)
Garlic & Cracked Pepper
(flaked pink sea-salt, micro-planed garlic, cracked peppercorns, a dribble of olive oil)
Pistachio & Chives
(cheese salt, minced chives and chopped pistachios)

And because I was feeling adventurous with today's batches, I took a fruity botanical route with:
Apricot-Cayenne-Mace
(dried apricots, sprinkles of dried ginger, cayenne, and mace, and chopped borage flowers)
Boysenberry
(macerated boysenberries in honey, cheese salt)

Mama went to the store today and brought home crackers and sweet cherries and we had a royal feast upon her return. I cannot wait to get back in town and try out our other flavor combos we brainstormed today (lemon-dill and orange-basil?). I also received the good news that Mama ordered three new cultures as well as citric acid which means that we'll be able to make mozzerella and real chevre among other things. Ohhhhh yessssss. And if it couldn't be any better, my friend Brittany (whose company I've been able to enjoy in our home this week) read to me an essay by Chesterton on "The Neglect of Cheese in European Literature". It is hilarious.

Let the hunger games begin.

Monday, February 24, 2014

{The Shrinkage Diaries} Paleo Fudge


This is fudge.

This is also healthy fudge.

This is also crazy-delicious, why-haven't-I-made-it-before fudge.

This is also gluten-free, dairy-free, refined-sugar-free fudge.

I just thought you might like to know.

It's creamy, delicious, and disappeared quicker than you can say "Bobshruckle" (It took me about eighteen years to realize Bert in Mary Poppins was saying "Bob's your uncle". I still prefer my way). If you're in the middle of a Shrinkage Plan (like me), you seriously ought to consider making this fudge. Also, if you're on a Paleo diet, this is compatible with that, so cheers! I've slung the recipe at you below:


Paleo Fudge

  • 1/2 c. almond or peanut butter
  • 1/2 c. cocoa powder
  • 1/2 c. coconut oil
  • 1/4 c. raw honey
  • Dash of vanilla if desired


  1.  Combine all ingredients in food processor until smooth and creamy. If desired, stir in shredded coconut, chopped nuts, or dried fruit.
  2. Spread into waxed paper-lined pan and chill for 30 minutes before cutting into squares.
Hope you make and enjoy this healthy treat soon! It certainly makes resisting bad-for-you foods easier to bear. And if you use peanut-butter, it really does begin to taste like a dark chocolate Reese's cup! Friendly toward your body, easy to make--what more could a girl ask for?

Wednesday, November 13, 2013

The Shrinkage Diaries: Hot Cocoa Revamped


Good news, people! The Shrinkage Diaries is back. I haven't been posting about it recently, but I am still eating better and exercising more than I did in days of yore. Haven't been AS lovely about it as my sister Leah who is now a little skinny-minny while I am still...not, but I am doing far better than I once was and I like how I feel when I'm working hard. :)

In the last two days we've had the first fire in our woodstove and the first snow. Of course it wasn't much snow and it didn't stick but for an hour there were spittings of white precipitation that was undoubtedly snow. And that's a big thing in Southern Virginia, to get snow in November. It is a truth universally acknowledged though that with cold weather comes the desire to do sedentary things like sit by that fire and read James Herriot and drink hot cocoa. Also to listen to Christmas music. I almost never listen to Christmas music before Thanksgiving as I don't want to get tired of it, but somehow with the weather being so cold and everyone from the radio-stations to Ann Voskamp playing the old favorites (not to mention the girls practicing carols on the piano) I'm starting to slide into the realm of listeners. I'm actually feeling very holidayish: we're having two friends to Thanksgiving who are single and have no family nearby to spend the holidays with. Cannot wait to take Tatum Black Friday shopping for the first time! To counteract the demands all these cold-weather activities make on my waistline, I took a long walk in the cold, biting wind yesterday and arrived home with all my makeup wiped off by the tears I kept having to wipe away in the face of the blast. Feeling thoroughly frozen at that time, I marched into the kitchen and made myself a cup of hot cocoa. But not any cocoa, since I didn't want to undo the benefits of the walk for which I'd sacrificed my carefully-applied smokey-eye makeup. This cocoa is what I call "clean". No one, not even the Chocolate-Covered Katie herself, could crrrrrriticize its ingredients. (unless she's lactose intolerant or something) I mentioned something of this wonder-drink in a Facebook post and it was suggested that I post the recipe here after I explained what the heck "clean hot cocoa" was. Of course posting a recipe meant I'd need pictures which meant I'd get to make more today...so I did. Here, then, is the result:


Clean Hot Cocoa:
  • 2 Tbs. (or less) of pure maple syrup
  • 2 Tbs. cocoa powder
  • A dash of salt
  • 8-12 oz. milk (I usually go for 12 or it gets too rich)
  • Splash of vanilla
On the stovetop, whisk-together the maple syrup, cocoa powder, and salt. Stir constantly while simmering for one minute, then whisk in the milk. Heat cocoa per your preference in temperature. When hot enough, remove from stove and stir in vanilla. Enjoy!


This cocoa is smooth, rich, and creamy (and would be more-so if I had been able to get hold of some raw milk), and you won't miss a thing from the normal junk that is full of refined sugars! Feel free to adjust the ratio of maple syrup to cocoa powder--mine was a little sweet. I am excited to have worked out a clean way to have cocoa this early in the cold-season. Also in preparation for the fall/winter, I have been training myself to drink tea and coffee without even honey as a sweetener so hopefully my waist will continue to shrink. (ha. HAHAHA. ha.) Stay tuned for more "clean" holiday treat posts! I want to try my hand at peppermint-bark, fudge, gingerbread men, and more! Let's see what I can do, and if my waist survives the holiday season! Let's call it: The Shrinkage Diaries: Candy-Cane Style. ;)

Toodles! Let me know if there are any specific recipes you'd like me to renovate and I'll see what I can do. In the meantime, drink this hot-chocolate without guilt: your health will love you and give you a nice slap on the shoulder for being such a spiffing fellow.

Wednesday, July 24, 2013

Culinary Cabaret!

Hey guys! Check out the brand-new news from the sister-blog, Two's Company that I share with Sarah! :)

Okay guys! I am thrilled and excited to introduce to you to the new blog series starting here on Two's Company! This series will be called "Culinary Cabaret" after the line in Disney's "Be Our Guest" which runs: "Beef ragout, cheese souffle, pies and puddings en flambe! We'll prepare and serve with flair a culinary cabaret!"Essentially, this series is a challenge you all will be able to link up with any week you'd like! It will run for 52 weeks (hopefully 52 adjacent weeks...we'll see how that works out) which is a year. The idea is that each week I'll post a theme, and you will have a chance to make one new recipe (or a variation of an old one) that fits the theme. Themes could be as simple as "Indian", "Greek", "Italian" or as complex as "Pixar Movies", "Downton Abbey", "Autumn", or, hey, something as crazy as "Oxford don". Sarah and I will chose one new recipe a week and blog about it--and you'll do the same!


And for those of you who are sitting there looking at this post thinking, "Aw, gee, I don't think I can be that creative," all I'm saying is that it is one recipe a week. Not a whole meal. It won't be expensive because, hey, people in India don't always have a ton of money and if you've got some watermelon and some milk and ice you can make a melon lassi that would fit that theme and not cost a dime. And besides--a challenge isn't supposed to be terribly easy. It's meant to be doable though, and I thoroughly believe that one new recipe a week is doable. I will be posting the theme for the week on Mondays and you will have until the following Monday to link up with your post and recipe. Not only will Culinary Cabaret improve your own creativity, but we can serve as inspirations for each other! And remember, linking up once does not mean that you have to do all 52 weeks! I would love to see you anytime throughout the course of the challenge. So please spread the word, and if any of you are wizards with blog buttons, feel free to make and share a button about the challenge. I want to get as many people involved as possible. :)

Looking forward to breaking out my skillz,
                                                          Rachel

Monday, March 11, 2013

The Shrinkage Diaries: Breakfast in the Bahamas


Dear Figure,

      I bet it'd be really easy to be skinny in the Bahamas. It seems like a place where--since one is required to wear a bathing suit even at Christmas--one would be more conscious of eating pineapples and mangoes and other fruits. I have friends who were in the Bahamas last week. Yup. They're an amazing couple who work really hard and deserve a vacation like this. Still...for those of us winter-bound in Virginia, it can be a bit...ehhhhhhhh... to see the photos of these friends on pristine beaches, looking like an ad out of a travel magazine. Jill even got sunburned. In March!

So! What's a girl to do when the sun is just starting to warm up, and you, Figure, are requiring something schnazzy to keep inspired to trim down? I make a Bahama Breakfast, that's what! Pair this "clean" muffin recipe with a smoothie made out of frozen pineapple, mango, and peaches blent with coconut milk, and voila! You'll look like a beach-bum in no time. :)

Choco-Tropic Oat Muffins


I started with this recipe, but quickly expanded the add-ins to make these unbelievably delicious, exotic muffins! Perfect for a spring morning!
  • 2 1/2 cups rolled oats
  • 2 tsp. baking powder
  • 1 tsp. baking soda
  • 1/4 tsp. salt
  • 1 c. yogurt
  • 2 eggs
  • 1/3 c. honey
  • 1 tsp. vanilla
  • 2 ripe bananas, smashed
  • 1/3 c. unsweetened, shredded coconut
  • 1/3 c. slivered almonds
  • 1/3 c. dark chocolate chips, chopped
  1. Pulverize oats in blender or food processor until you have a "flour". Add in other dry ingredients.
  2. Mix wet ingredients together, then add to dry. Mix with a few quick strokes
  3. Line muffin tin with papers, and bake muffins at 400 degrees for 15 minutes or until toothpick inserted in center comes out clean.

Makes 1 dozen muffins

These muffins were way more delicious than I'd even hoped. I mean really--did you ever think you could make a muffin that had not flour or sugar?! I'd heard of replacing the sugar with honey, and even done it before, but most times the muffin ended up tough with a leathery "skin". These muffins are fluffy at the same time they're full of texture from the coconut, almonds, and chocolate chips. Definitely a keeper recipe: one to use over and over again!

In other news, I'm creating: Shrinkage Diaries: The Cookbook for my own use. Can't wait to stock it with many more of the recipes I've been experimenting on!

Thursday, March 7, 2013

The Shrinkage Diaries: and some days you'd like to kill the cat


Dear Figure,

       Today I'd like to bite nails. Like...metal ones.
       Today I'd like to throw something.
       Today I'd like to go to a Krispy Kreme and eat every raspberry doughnut on the place.
       And yes. Today I'd almost like to kill my cat.

The reason? Eh. I don't know that I have one. To quote a friend, "It must be a Thursday. I could never get the hang of Thursdays." And as for the cat, I came downstairs this morning and was greeted by Dad very sweetly saying: "Good-morning, but your cat apparently couldn't use her litter box last night and went in the laundry basket."
Oy vay.

Yeah. Not an auspicious start to my day. I think this strange humor began last night with a chocolate craving.  I almost caved and made brownies, but I am so glad Leah wouldn't let me. Instead I went to Pinterest, and from there to one of my new favorite recipe sites: The Gracious Pantry, and oh. my. stinkin'. goodness.

Figure: I totally owned you last night. How?

By whipping up a batch of her Clean Eating Double-Chocolate Oreos. I'm not even kidding. These things...they're...they're....they are "simply too too too diveen!" For real. As my FB feed would show...

"I will NOT eat all the clean-eating oreo dough before baking. I will NOT!"

And really. It was hard not to. Sarah was a skeptic and didn't want to admit that the smell rising out of the oven was akin to ambrosial breezes from the ever-after. But seriously, girls. Who cares about eating clean. At the moment these cookies were ready to come out of the oven, I would challenge the staunchest junk-fooder to say they tasted "too healthy." These are not only the best clean-eating cookie I've ever had...they are the best chocolate cookie I've ever had. Even counting everything bad-for-you I have tasted my whole life through. For reals, people. For reals. And to raise perfection an increment higher, yesterday was the 101st birthday of the Oreo cookie! :) Perhaps it was the Dutch-processed cocoa Mrs. Vandebrooke gave us that lent these cookies such elegance. So rich and divine you could only eat one stack. You only dared eat one, for fear of what might happen to you if you experienced such grandeur over again. ;)

Whatever it was, I am never going to taste anything quite that craving-quenching in my life. Now. The recipe.

Clean Eating Double-Chocolate Oreos

Cookie ingredients: 
8 oz. almonds ground into "flour"
1 c. unsweetened cocoa
1/3 c. honey or maple syrup (I used honey)
1/3 c. coconut oil
1 large egg
1 teaspoon vanilla

Filling ingredients:
1/4 c. coconut oil
1/3 c. unsweetened cocoa
3 Tbs. honey or maple syrup (I used honey)
1 tsp. vanilla

Step One: Blend almond flour and cocoa powder together in bowl. Add other ingredients and mix well with a wooden spoon.

Step Two: Form walnut-size balls and flatten with the palm of your hand till cookies are desired thickness. They will not rise or flatten in the oven, so what you see is what you get. Form accordingly. Place on parchment-lined baking sheets. Bake at 350 degrees F for 15-20 minutes.

Step Three: Blend all filling ingredients together in blender or food processer, and keep in fridge till thickened. You might want to add a little more cocoa if your filling is too runny, but it will firm up and thicken as it sits a moment so wait to add anything till you're certain.

Step Four: Once cookies are cool, assemble with filling between two cookies.

Makes 10-12 sandwiches

So Figure? Never again am I going to lament that I can't entirely satisfy my chocolate craving while catering to your touchy whims. Because, honestly? Even if I threw my hunt for you to the wind, I'd never find a better-tasting recipe than this.

Tuesday, March 5, 2013

The Shrinkage Diaries: It looks like a bird's nest...


Dear Figure-seekers!

If you would be so kind, take a look at the picture below....


This is a severely inauspicious plate of food.

Honestly. It looks like a cross between a haystack, a bird's nest, and what I used to pull out of the garbage disposal when it got clogged up. (That is, before we moved out to the country where we can't have a garbage disposal system.)

Look at it again.

It looks bland at best, I know. But this is pancit, and it is one of the stinkin' best Asian dishes there is to feed a large crowd. My first introduction to pancit was way back at the church where my Dad worked as assistant music pastor. There was a Philippino woman in the choir, and on occasion she would make pancit for us. Then a Philippino couple moved down the street from us, and she made us dinner and lo and behold, pancit popped up again. Then we moved churches and house, and I forgot all about this amazing dinner until we were at a friend's party, and there again was a huge bowl of the stuff. In fact, I'm pretty sure it was at a Narnian costume party to which I went dressed as The Lady of the Green Kirtle. I ate pancit again, and boom! Right back to memory lane. 

The best part about this meal is that it's waist-friendly, (more-so if you use chicken instead of beef) and qualifies as Shrinkage food because there's not a smidge flour or sugar, and it's packed with veggies. Also, it's gluten free, because those are rice-noodles up there, not wheat, which makes them much better. It would be awesome if you could buy brown-rice noodles, but for now these are great.

Pancit is one of those things that is great for feeding large families because it's kind of a catch-all dish. You can use any kind of meat in the dish. (We've used chicken, beef, shrimp, etc.) Really whatever you have on hand. Last night we had ground beef, and I'd never done that before. When I think of Asian cuisine, ground beef isn't exactly the first thing I think of. I knew I'd need to kick the recipe up a notch of I didn't want dinner to taste like a Teriyaki-Burger from a Japanese McDonald's.

Fast Fun Tip: While rummaging around for the best chili recipe for Dad, I had stumbled across a website that I can't find now. The guy writing the article mentioned that most of the time we don't "brown" ground beef, we "grey" it. In short, we put too much meat in the pan at once and it basically boils in the fat without ever gaining that awesome "browned" flavor. This time I took my pound of ground beef and did it in three separate chunks, smushing the ground beef into patties, sprinkling a bit of soy sauce, Worcestershire sauce, red pepper flakes, salt, and minced ginger over the top, then flipping the patties and breaking them apart. This is THE BOMB and allowed me to impart a vague Asian flare to the ground beef which was lacking beforehand.

Okay. So now that we've established how you have to cook your beef if you are using beef, we can get on with the real recipe. Again, it's a "per your own taste" thing, so the measurements for spices are going to be rather ambiguous. I change it every time depending on what we have on hand and what flavors I'm feeling. 

Pancit

  • 1 head cabbage
  • 1 red bell pepper
  • 12 carrots
  • 2 onions
  • 3 tbs. minced ginger
  • 4 ribs celery
  • garlic
  • 1 lb. ground beef (or other meat, chopped)
  • 1/2 c. soy sauce (and a bit for serving)
  • 1/2 c. lemon juice
  • 1/4 c. rice vinegar
  • 1/4 c. Worcestershire sauce
  • Salt
  • red-pepper flakes
  • olive oil or sesame oil
  • peanuts
  • 2 packages rice noodles (we use Mai Fu)

  1. Start by slicing up all vegetables sensibly. The idea is not chunky--it's long strips to match the noodles. I left my carrot round just because they'd go farther, but onions, cabbage, and peppers can be cut into strips. Toss all veggies in a bowl together.
  2. Brown the ground beef per my instructions further up the post. Set aside.
  3. This is going to get majorly messy, and this recipe feeds a lot of people. A whole lot. Like...twelve of us with leftovers. So you'll need three skillets on the stove. Pour a bit of olive oil into the bottoms of the pans, and sautee leftover ginger and a spoonful of garlic in each man till golden. Divide the veggies into the three pans, and sautee for ten minutes until the vegetables are tender. Dash all your soy/vinegar/worcestershire sauces over the vegetables and continue to cook. Sprinkle with salt and red pepper flakes. When vegetables are done, cover and let steam while you work on the noodles.
  4. Rice noodles are really cool because you don't boil them. Your first step will be to pull the noodles apart and put them in the bottom of some great big bowl. Then you will boil a kettle-full of water (a couple quarts) on the stove. When it is at a rolling boil, pour the water over the dry noodles, cover the bowl with a tray of some sort, and let steam until noodles are tender.
  5. Drain your noodles, and mix the noodles, beef, and vegetables together. Add more soy sauce to taste, and mix well. This will kill your arms. You may have to chop up the noodles a bit in order to be able to stir.


Serve on plates and dig in! This is a wonderful meal for a party because it's pretty cheap and goes a really long way. Plus, it is delicious, and easy to throw together; you really can't go wrong with seasonings. At different times I have sprinkled in tons of different spices, drizzled a bit of molasses, dabbled in some clam juice...anything you have on hand. Take my word for it. 

Try this recipe next time you are having an Asian-themed party or just a great big family get-together. It's delicious, and everyone will want the recipe. Then it will be your turn to tell them you pretty much did it on the wing, because with pancit you can't go wrong. Plus, your figure will thank you for making life easy.

Tuesday, February 19, 2013

The Shrinkage Diaries: When the Wallet's Shrinking but you're not


Dear Figure,
       Eeeeeeeeeeeeeeeeeeeeeeeeeeeeeeeeeeeeeeeeeeeeeeeeeeeeeeeeeeeeeeeeeeeeeeeeeeeeee
^ Do you hear that? It might look the wail of a small mosquito, but actually, it's the sound I made all this past week as our pantry emptied, we waited for checks in the mail to be able to stock back up, and the choices for healthy eating dwindled. I mean, really. Okay. So I know I haven't been religious in my NOTHING FLOUR and NOTHING SUGAR this past week, but I have been exercising and I have been eating mostly none and none. Yeah. Valentine's day threw me off.
        But anyway, I was sitting on my bed yesterday around lunchtime reading up on Alexsander Solzhenitsyn and generally lost in Communist Russia when Mama poked her head through the door and informed me that she was working on school with the younger ones, and would I be so kind as to fix something alive for lunch because she couldn't eat any more "dead food" if she was a POW in Stalag 13. Or maybe it was "I would throw up if I had to eat any more popcorn." (I've heard it both ways.) I was just stuck in Russia, remember.

"We have...cucumbers, cabbage...some onions...oh! and chick peas."

And then she went downstairs, and Figure? I felt you dancing in high glee because you thought I would have to make something wretched like cabbage soup. I mean anyone who has seen Charlie and the Chocolate Factory will remember...

"Oh. Well....nothing goes better with cabbage than cabbage!"

But if I made something wretched like cabbage soup, it would appear that your bet was winning, Figure, and you were convincing me that eating healthy tasted like...dishwater. Perhaps it was the influence of Communist Russia that sent me to Google, but I sat down at the computer and typed in "raw salad cucumbers cabbage" not expecting anything to come up. But something did. Something from a Russian cooking website (the sterling truth) and I decided to try it...and what came out was absolutely delicious.

But to feed eleven or twelve people off of a cabbage salad while all right for Charlie Bucket & Co. is a little weak and wimpy and giving-uppish. In all my digging I found that we did have some carrots so I thought to myself, I thought: "Aha. Let us make hummus  out of the chick peas. Oh...but we don't have lemon juice, do we?"
No lemons. Not a juice anywhere. Not even lime juice, which works in a pinch. But I wanted hummus. I really wanted it, and I sat there for a moment, thinking rather harder than usual. Then the proverbial lightbulb came one and I decided I'd outwit our pantry.

No lemon juice?

No problem.

Instead I used red wine vinegar and a generous sprinkling of lemon-pepper seasoning. The result was Mediterranean in the extreme, and an awesome coupling for the Russian Cabbage Salad. Lunch was delicious, healthy, and unique and what's even better--built off a pantry and fridge as emaciated as Alexsander Solzhenitsyn after leaving his Gulag Archipelago. Below I've posted the Salad Recipe for you readers who are also standing victorious over your Figures! :) (I would have posted the hummus recipe too, but that'll have to wait for another post because I deleted the picture I took, and I hate "blind" recipes.)

Russian Cabbage Cucumber Salad


  • 1 head cabbage
  • 2 cucumbers
  • 1 onion
  • 1 tsp. salt
  • 2 tbs. vinegar
  • 2 tbs. olive oil
1. Slice the cabbage in thin slices, then sprinkle with salt and knead (like bread dough) till the cabbage begins to look a little juicy.
2. Slice cucumbers into quarters, then slice quarters. Slice onion into thin slices. Mix into cabbage.
3. Drizzle with olive oil and vinegar (adding more to taste if desired) and mix 'er up.
Makes rather a lot 

Things like cabbage and cucumbers are really cheap in the scheme of things. The other day Mama and I were discussing the fact that Hispanic food and potatoes are always really cheap (though not particularly good for you) because the Irish and the Mexican cultures aren't known for having an overabundance of extra money. But you don't have to have a diet based entirely off of cheap corn and potatoes--there are vegetables that aren't exotic (like carrots, cabbage, cucumbers...even some peppers) that will be fairly easy on the budget, and very easy on your waist, so try buying those instead of more potatoes. :P
                
          With a temporarily stocked pantry at last,
                                                                 Rachel

Friday, February 8, 2013

The Shrinkage Diaries: Plateaus and Peaches


Dear Figure,
       Well.... we've had some intense moments of WILL YOU EVER SHOW YOURSELF!? this week, but I know that's just an attempt on your part to hide yourself from me and make me give it up. But know what? I'm not going to give it up because that would be lamer than you being a coward and hiding. I call this stage in Shrinkage the "Plateau". It's the time when you've shrunk along quite well for a week or two and suddenly stop "seeing" the results. You feel great, yes, but the results aren't visible. These are the times that are easiest to revert to your old paths, but these are also the defining moments when you'll see if you have what it takes to rummage up a Figure.

I am determined. Though I did buckle for a couple tiny slivers of Sarah's buckeye brownies, I successfully avoided many things this week that could have totally become snack-time. Including the beautiful, aromatic cinnamon raisin biscuits Dad got up and made this morning. I sat there with my energy bar thinking about you, Figure, and wishing we hadn't toasted the sesame seeds this time because it made the bars taste like savory crackers crumbled in honey.

But I didn't cave.

On Pinterest I saw a list of things called "The Skinny Rules" and one of them stuck out as being a really good piece of wisdom. (something Mama has always recommended, and I follow.) Plan one meal a week that is your fun meal. Have something at that meal that isn't necessarily good for you. It might be some pizza on your family pizza night. It might be a little cheesecake at a church dinner. (*smiles at Julia*) It could be anything, but it keeps you from feeling deprived.

I've been experimenting further with awesome sugarless-flourless desserts, and here is the promised Peach Froyo recipe. I made Chocolate-Banana froyo and the peach froyo, and the peach was by far my favorite. :)


Peach Froyo
  • Two cups Greek yogurt
  • 2 cups fresh or frozen peach slices
  • 2-3 Tbs. honey
  • 1 tsp. vanilla extract
  • 2 pinches sea-salt (this is essential, as it brings out the peach flavor!)


The only steps here are to stick it all in the blender and blend it till it's....blent! (And Shakespeare uses that word so THERE!) Then you dump it in a loaf pan, and stick it in the freezer for a matter of 3 or 4 hours. If you leave it in longer than that (and even then) you will want to let it sit for about 20 minutes to be soft enough to scoop. I used a cookie-dough scooper to scoop out the froyo because this is really really rich and you don't want a lot of it! What I served my helping in is a small teacup, and you can see the size-reference from the almonds. :)

So dear Figure of mine, though you're deluding me with thinking you'll never come out of hiding, I am continuing on my exercise regime, continuing on making new and wonderful recipes and living a life of Shrinkage!

For those of you who are already shrunk or already eating healthy, I'd encourage you to send a brief note to a friend who is still fighting for her Figure and for general health and fitness. One of my dear friends Facebook-messaged me just letting me know how proud she was of me and that she entirely supported my fight for a Figure and admired it. That made my week, and I intend to pass the favor on someday. After all, how could she have known that I was having a Plateau Week? You never know when your little message could mean the difference between excellent Peach Froyo or Buckeye brownies. ;)

             Much much determination and tough-love,
                                                 Rachel

Monday, February 4, 2013

The Shrinkage Diaries: Almond Joy Truffles


Dear Figure,
     The start to this week has been most wonderfully heartening because despite the fact that it has only been a week on the quest to you, I did think Sunday that I caught a glimpse of you lurking about. Mama further pleased me by stating that my body seems to respond nicely to Shrinkage efforts and she could tell after one week that I was on the right track and that I was gaining a waist. Yippee. I've foiled all your attempts thus far at eluding me.
      But at certain times in a girl's life, she craves treats, and when she is trying to find a Figure (yes, in spite of the buckeye brownie she chose to eat on a coffee date), she goes on a track to find the best recipes. And sometimes she decides to fling caution to the wind and completely change a recipe so it doesn't look a thing like the original. Thus, Figure, I have outwitted your schemes to make me crave chocolate, and I now present for you and all other Shrinkers, the Clean-Eating Almond Joy Truffle. 


Clean-Eating Almond Joy Truffles

  • 3/4 c. almond butter
  • 1/2 honey
  • 1 3/4 c. rolled oats
  • 1/4 c. unsweetened, flaked coconut
  • 1/4 tsp. cinnamon
  • 1/4 tsp. salt
  • 1/3 c. cocoa
  • 1/2 c. raisins
  • 1 Tbs. + 1 tsp. coconut oil
  • 60% cocoa chips for dipping


1. Warm almond butter and honey
2. Mix other ingredients together, then add the almond butter and honey and roll into 1" balls.
3. Chill for a little while you melt chocolate chips with the additional teaspoon coconut oil. Remove from fridge and dollop chocolate on tops of truffles.
4. Cut a few raisins into triangles and poise on top of truffles.
Makes approximately 30 truffles

Figure...these things are killer. Seriously. They taste just like Almond Joy bars, and certainly don't leave you wanting for anything else. I managed to exercise every day last week. What is hilarious is that I didn't mean to exercise Sunday, but I worked myself into a rather bad humor and decided to dose myself with one of my fierce, wonderful walks on which I pray aloud and come home cheerful as you please. I ended up walking at least a mile and a half or so, which made me laugh when I realized God had managed to change my attitude and help me with Shrinkage all at once.

I did see you Figure. I really did. And this T-shirt showing less lumps is witness. Boo-yeah. Stay tuned, Figure, for more shockingly amazing recipes which include Peach and Chocolate-Banana Froyo recipes!

    Chasing after you with a club and my awesome truffles,
                            Rachel


Wednesday, January 16, 2013

Best Foot Forward Challenge: Day 3


So today the main event was to try out the flaxseed hair gel I made yesterday. Mama and sisters were very very dubious as to how it would work. I was determined, but had no idea if it was a good idea or not. But it's something I have wanted to try for some time, and this is what "Dressing up to Knock Around the House" days are for, right? Trying things out here in case they won't work there? This morning I got up, showered, and ran the gooey-goop (it looks exactly like the cave trolls' "floaters", btw) through my hair, and scrunched it repeatedly.

Did it work?

You judge: 


I honestly think it did. If nothing else, it smoothed my frizz and made my hair kitten-fur soft. I'm not kidding. This is the best junk I've ever put in my hair. (Not that I've used much gel, but you know.)

And because I know you're asking, here's the recipe:

Homemade Flaxseed Hair Gel

1/4 c. flax seeds
1 c. water
1 tsp. coconut oil

Boil all ingredients together till it becomes the thickness of unwhipped egg-whites. Remove from heat, give a good whisk once or twice, then strain and keep in a jar in the fridge. You can add essential oils (I didn't have any on hand) and you can re-use the seeds over and over to make more till they won't get gooey! Isn't that awesome? It made me happy to hear it. :) 
To use, just apply liberally in your hair and scrunch the curls. Let air dry. This doesn't make your hair crunchy at all, and the coconut oil moisturizes!

Now for the rest of the outfit:


 Leah laughed at my post in the full-length picture, but it's grey and rainy again, and the only place to take the photos was on the front porch, and it was not working out so finally I struck a  "Take that...HOMEBOY!" pose and got the picture. Hence the inner-city tossing of the hands.

 And the bare feet. Or perhaps that's because I'm a country bumpkin now.

Pardon the idiotic expression on my face. I was attempting to show you my makeup, and when I smile my eyes have a habit of crinkling up so you can't see my makeup. I used Loreal "Desert Rose" palette, I think--basically browns. I sprayed on a little "Innis Moonlight" to make myself smell nice. :D

Because the whole outfit was feeling brown, I added NYC "The Red Hots" Duos (the tangerine side) lipstick. :) A gold bracelet, gold watch, black and crystal bracelet, and matching necklace and earrings finished the thing. 


Ohhhhh dear. This gets funnier the longer you look at it. On the bright side, my complexion is marvelous. I am wearing no foundation or concealer or blush. (Thus I'm a little pale, but oh well.)


The dragon-hoard bracelet goes on the other arm, but that arm was the one holding the candle. What can ya do? Nothing.
What is your outfit for Day Three?


Tuesday, September 11, 2012

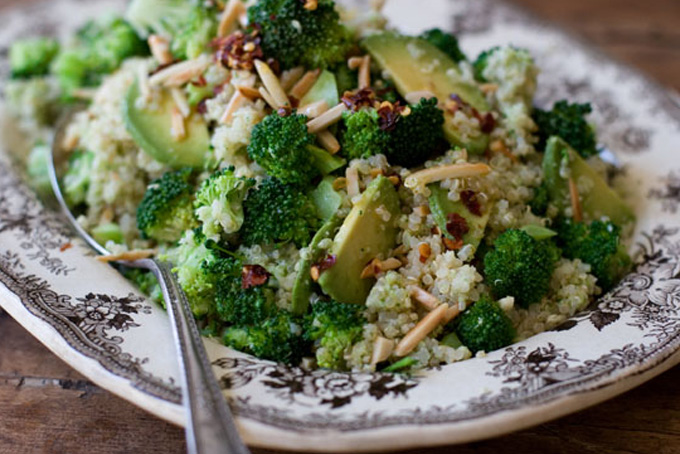
Capering and Cookery: Double Broccoli Quinoa {otherwise entitled: amazing}

Tonight's menu included lemon-pepper chicken and homemade applesauce, but something was lacking in the menu. Mama suggested I use the quinoa (keen-wah) we've had around and find a recipe that would be both different and delicious so that we wouldn't have to go the usual round of brown rice-blah.
Enter Google-search-gone-right-for-once.

I happened upon 101 Cookbooks: a recipe journal. Frankly, the name of the site wasn't that appealing, but one recipe caught my eye: Double Broccoli Quinoa. The reason the recipe struck me was simply because we had quinoa and we had broccoli and everyone in our family {more or less} likes both. The minute I read this recipe, looked at the photo (which I've pirated. It's Heidi's--remember that!) and thought about it for a second, I knew this was going to go on the dinner menu. It. was. amazing. Even with the alterations I made to the recipe. I've included my alterations on the recipe I'm sharing here, but if you follow this link you'll get to the original. :)

Source


Double Broccoli Quinoa

3 cups cooked quinoa*
5 cups raw broccoli, cut into small florets and stems
3 medium garlic cloves
2/3 cup sliced or slivered almonds, toasted
2 big pinches salt
2 tablespoons fresh lemon juice
1/4 cup olive oil
1/4 cup yogurt mixed with a little milk
Optional toppings: slivered basil, fire oil (optional)**, sliced avocado
crumbled feta or goat cheese
Heat the quinoa and set aside. I put cooked mine in chicken broth leftover from dinner a few nights ago.
Now barely cook the broccoli by pouring 3/4 cup water into a large pot and bringing it to a simmer. Add a big pinch of salt and stir in the broccoli. Cover and cook for a minute, just long enough to take the raw edge off. Transfer the broccoli to a strainer and run under cold water until it stops cooking. Set aside.
To make the broccoli pesto puree two cups of the cooked broccoli, the garlic, 1/2 cup of the almonds, Parmesan, salt, and lemon juice in a food processor. Drizzle in the olive oil and cream and pulse until smooth.
Just before serving, toss the quinoa and remaining broccoli florets with about 1/2 of the broccoli pesto. Taste and adjust if needed, you might want to add more of the pest a bit at a time, or you might want a bit more salt or an added squeeze of lemon juice. Turn out onto a serving platter and top with the remaining almonds, a drizzle of the chile oil, and some sliced avocado or any of the other optional toppings.
Serves 4 - 6.
*To cook quinoa: rinse one cup of quinoa in a fine-meshed strainer. In a medium saucepan heat the quinoa, two cups of water (or broth if you like), and a few big pinches of salt until boiling. Reduce heat and simmer until water is absorbed and quinoa fluffs up, about 15 minutes. Quinoa is done when you can see the curlique in each grain, and it is tender with a bit of pop to each bite. Drain any extra water and set aside.
**To make the red chile oil: You'll need 1/2 cup extra-virgin olive oil and 1 1/2 teaspoons crushed red pepper flakes. If you can, make the chile oil a day or so ahead of time by heating the olive oil in a small saucepan for a couple minutes - until it is about as hot as you would need it to saute some onions, but not so hot that it smokes or smells acrid or burned. Turn off the heat and stir in the crushed red pepper flakes. Set aside and let cool, then store in refrigerator. Bring to room temp again before using.
Prep time: 10 min - Cook time: 10 min


I was impressed with the fresh, spunky flavor of this dish--perfectly filling while still feeling light...unlike most rice and grain dishes. The toasted almonds give it a nutty flavor and the lemon juice and yogurt spruce it up. Try this recipe--I promise you won't be disappointed!

Monday, May 21, 2012

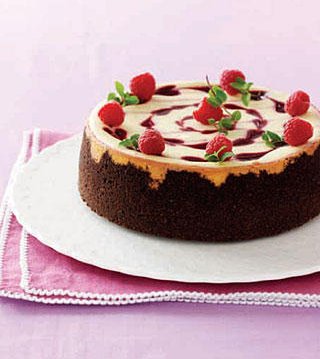
in love with cheesecake.

The days our wallets are slimmest, our waists are thickest, our cupboards are emptiest and our schedules are fullest are inevitably the days that the cooking/baking bug bites.

Mine bit today.

It bit hard.

It bit so hard I wriggled morosely in my chair before the computer screen as image after image of cool, delicious desserts popped up on the computer screen. I did have a good reason, however, because I decided I wanted to offer cheesecakes and baby-cakes on Coastal again and I needed to rummage up some good summer-style recipes. The only problem was that I couldn't make them today since I didn't have the ingredients. Oh well. The good thing about offering new products is that you have to test them before selling them. (Oh yeah!)

Here are a few recipes that will be coming out of my kitchen in the next few weeks:


Lime Coconut Cheesecake from Our Best Bites...


Lemon Cheesecake from Allrecipes.com...


Chocolate-Orange Cheesecake from LizzyHouse...


Argh. This isn't good for me. Cheesecake is my one weakness. ;)

Saturday, March 17, 2012

Capering and Cookery: The Ideal Southern Breakfast food. :)

As it is Saturday morning and a beautiful one to be out in the countryside, I thought I'd share some of my favorite, tried-and-true breakfast recipes! :) One of the first things you ought to know about me as a cook, is that I am picky about breakfast. Here's a definition of the top breakfasts foods, per my opinion:

  • French Toast: Soggy, egg-y, bread. Like someone dumped it in a pond, fished it out, heated it up, and tried to get you to buy it by pouring syrup on top.
  • Pancakes: Fairly tasty things when fresh and hot, but soon hardening and crusting into soggy discs that don't bear putting a fork into
  • Waffles: These and I had a love affair once-upon-a-time. When they are hot and crispy, Waffles and I are a pair. When they get a steam-bath, I will toss them out.
  • Oatmeal: "Ye ain't a true Scotchwoman if ye doon't lak yer parritch." Guess I'm not Scotch. I want to like oatmeal--I try more often than not and I can always get it to smell fabulous. But somehow the porridge will not absorb flavor and I feel like I'm eating baby-food.
  • Cereal: Come on guys, I'm not a horse. Don't feed me bran and corn-flakes and all that jazz. 
So what on earth do I like for breakfast, and what sort of recipes will you find in the body of this post? Let me tell you. I'm a huge fan of left-overs for breakfast. I love fruit cobblers and crumbles and things. I like a cinnamon-roll on occasion. I love granola and granola bars. But the epiphany of all breakfast foods (in my opinion) is a properly made, white-flour biscuit. Oh yes. So here's the scoop on this amazing food.

The Ideal Biscuit: Country, Southern Comfort
courtesy of pinterest

I don't believe I need to explain to anyone what I mean by that title. When you find one, you know it. When it isn't up to par, you know it too. My brother and I are a bit of biscuit aficionados. We like them done properly, and thus we generally take on the responsibility of making them. Here are my two favorite recipes. The first is our favorite in general because we usually have the ingredients on hand. The second is one that I had at a friend's house recently and fell in love with. Enjoy!

Cloud Biscuits
(from The Southern Living Cookbook)  
2 1/4 cups self-rising flour (if you don't have self-rising flour, make you own by using a ratio of 1 c. flour, 1 tsp baking soda, and 1/2 tsp. salt.)
1 Tbs. sugar
1/2 cup butter
1 large egg, beaten slightly
1/2 cup milk
1 Tbs. butter, melted

Combine flour and sugar in a medium bowl; stir well. Cut in butter till mixture is crumbly. Combine egg and milk, then add to flour mixture, stirring only till moistened. Turn dough out onto a lightly floured surface and knead 3 or 4 times. Roll dough to 1/2-inch thickness; cut with a biscuit cutter. Be careful not to twist the cutter--punch, rather than twist. If you twist, your biscuits will not rise well. Bake on an un-greased baking-sheet for 10 minutes (or until golden) at 450 degrees F. (makes 10-12 biscuits)

Whipping Cream Biscuits:
(from The Southern Living Cookbook)

2 cups self-rising flour
1 cup whipping cream.

Combine ingredients, stirring with a fork until blended. Dough will be stiff. Turn out onto a lightly floured surface and knead 10-12 times. Roll dough out to 1/2 inch thickness; cut with a biscuit cutter. Place on a lightly greased baking sheet and baking at 450 degrees F. for 10-12 minutes. (Makes 12 biscuits)
courtesy of pinterest

Both of these biscuit recipes are ah-may-zing. They rise fairly high--not entirely sky-high, but the rich, buttery, flaky texture so makes up for the height that you will want to eat half-a-dozen yourself. I do have to stress again the importance of using white flour in these recipes. Yes you can use wheat flour. You can use half-and-half flour, but to get that perfect Southern biscuit, go white. :P

The other recipe you might want to take a gander at sounds really strange. I was laughing when I read the title, but the recipe totally won me over as soon as I'd mixed up the batter. What is it?

Breakfast Cookies.

courtesy of pinterest
I didn't know what to expect from a recipe like this. What came out of it were large, palm-sized cookies with a soft texture and spicy flavor. The batter seriously tasted like Oatmeal Raisin Cliff Bars. I could have eaten the whole bowl without bother to bake them. They are healthy, hearty, taste stunning, and make a great snack for any time of the day. I made a couple of alterations, and here is the recipe for you!

Breakfast Cookies:

3/4 c. whole-wheat flour
1/2 c. all-purpose flour
1/4 c. ground flax-seed
1/2 tsp. baking soda
1 tsp. ground cinnamon
1/2 tsp. ground nutmeg
1/2 tsp. ground ginger
1/2 tsp. salt
2 Tbs. butter, melted
1/2 c. oil
1/4 c. brown sugar
3 Tbs. granulated sugar
1 egg
1/4 cup pureed carrots (you can use baby-food, but I make my own by boiling carrots and throwing them in my Bosch blender with a tidge of water.)
1 tsp. vanilla
1c. rolled oats (I've been using quick-oats and they work great)
1/2 c. raisins

Mix first 8 ingredients in a small bowl. Set aside. Mix butter, oil, sugars, egg, carrots, and vanilla in medium-size mixing bowl. Add the dry mixture. Stir well, then add oats and raisins. Line baking sheets with parchment paper and drop large spoonfuls of batter onto tray. Slightly flatten with palm. Bake at 350 degrees F. for 10-12 minutes. They cookies will be soft and fragrant when done. Let cool, then enjoy! (makes 1 dozen cookies)

These three recipes are my choice for breakfast--they are tried and true recipes that I know you and your family will love! :) Have a lovely Saturday--I suppose I'd better start making breakfast for my own crew now. Talk to you gals later!

Friday, March 2, 2012

Capering and Cookery: Tomato Bisque Soup

First off, Capering and Cookery is the name of the Recipe/Cooking Series I'm beginning on this blog. :) It is a name that has three reasons:
  1. It sounds much like a historical-dance-society's name: Capering and Kickery and I've always liked that.
  2. Fancy recipes seem to use a lot of somethings called "capers". I had always thought they were a sort of mushroom or something, like truffles. Come to find out they are pickled chrysanthemum buds!
  3. I like the name. It sounds bouncy and inspirational. :D

That being settled, I've come to teach you how to make the most amazing Tomato Bisque Soup. I don't use a recipe--I just do it by eye. But the other evening when I made it I tried to pay attention to quantities. This recipe should serve about...6-8 people I should think. (I usually make twice that quantity for my family) I had taken pictures documenting the whole process but Dad told me that we simply cannot put a single picture more on this computer or it will crash (Oh the joys of having a photographer for a sister) and so you will not get them, I'm afraid. But do not be afraid--it is a very simple recipe. :D

image courtesy of pinterest
Tomato Bisque Soup:
  • 3 ribs celery
  • 1 smallish onion
  • 1 stick of butter
  • 1/4 c. flour
  • 2 cups milk
  • 64 oz. tomato juice
  • 1 large (4-inch or so) can crushed tomatoes
  • mixture of basil, oregano, and a little thyme
  • salt
  • pepper
  • 2 tsp. sugar
Right. So here's the deal. You will start off by melting the butter in a large soup-pot on the stove. Meanwhile, finely chop the celery and onions. I like to make them small enough that they are pretty much diced onions and celery...not really chopped.

Throw 'em in the butter and saute over medium heat for 8-10 minutes--you want them to be translucent and soft, but not mushy.

Add your milk and stir well over low heat. Now you are in the middle steps of making a roux. (pronounced "roo") A roux is basically what Southern people call "white sauce". Its base is butter, milk, and flour. So using a whisk--and this is really important--stir in your flour. Make sure you whisk out all the flour-lumps, otherwise you might end up with lumpy bisque and that won't look good.

Continue stirring over low-medium heat. Once your roux has thickened till it is about the consistency of thinned sour-cream, dribble in your tomato juice and whisk together. When that is done, add your crushed tomatoes. If it is a little thick for you, feel free to add more tomato juice or even a little more milk--a bisque, however, ought to be on the thicker side of things, as it is a creamy soup.

Salt and pepper to taste. Add Italian herbs and sugar--the sugar is to cut the acidity of the tomatoes. I don't like thinking of adding sugar to soups and things, but when you are dealing with tomatoes it is a must. I even do it to pizza sauce!

Heat the brew on medium-high, stirring continuously. When heated, serve immediately and enjoy!

Servings: 6-8
Time: 30 minutes
Difficulty level: Easy-Medium (It would be an "Easy" recipe, only the roux makes it a little harder)

I can attest that this is a stinkin' amazing recipe--I don't usually go for the whole tomato-soup thing, but this is incontestable. We usually pair it either with a salad and homemade foccacia bread, or with tuna-salad sandwiches. Either way, it is a superb, elegant, and easy recipe to whip up when you're feeling ready for something a bit different than usual. Try it and let me know how it comes out. :)